Tumpixel
Tumpixel
How to Create Your First Website (Without Getting Stuck in Tools)
Building a website with Tumpixel is different from traditional builders.
Instead of just dragging blocks, you’re working with a modular system — meaning you can scale from a simple landing page to a full business platform (e-commerce, CRM, HRM…).
In this guide, you’ll learn how to create your first website from scratch to live, including how to handle a common issue when installing modules.
01
Create Your Website
Start from the dashboard:
Open Control Center and Go to My websites
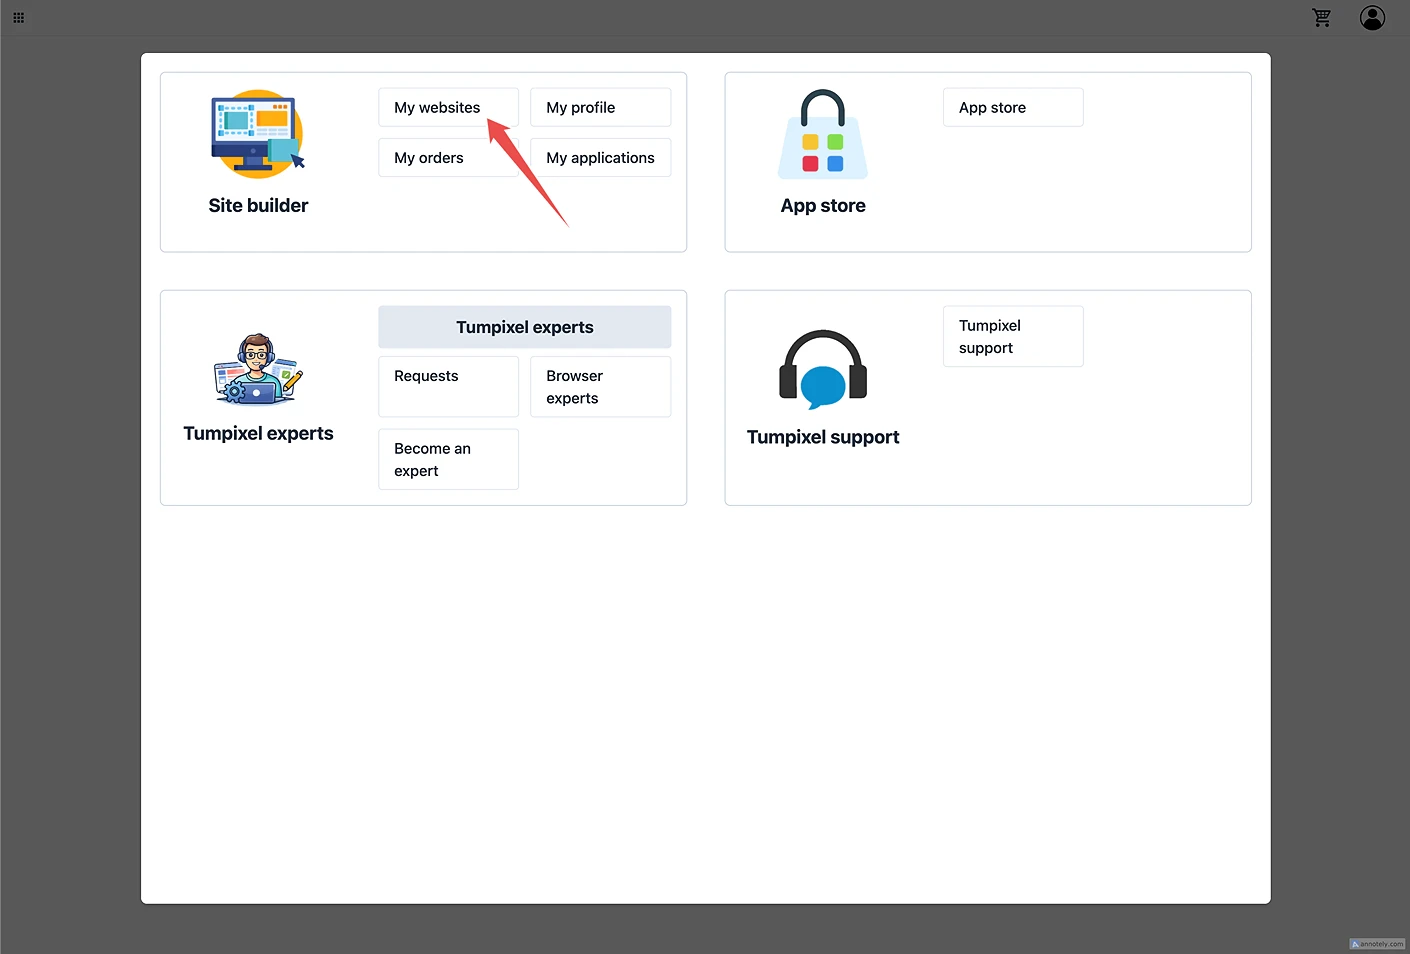
Click “Add new website”

Enter:
Site name
Language
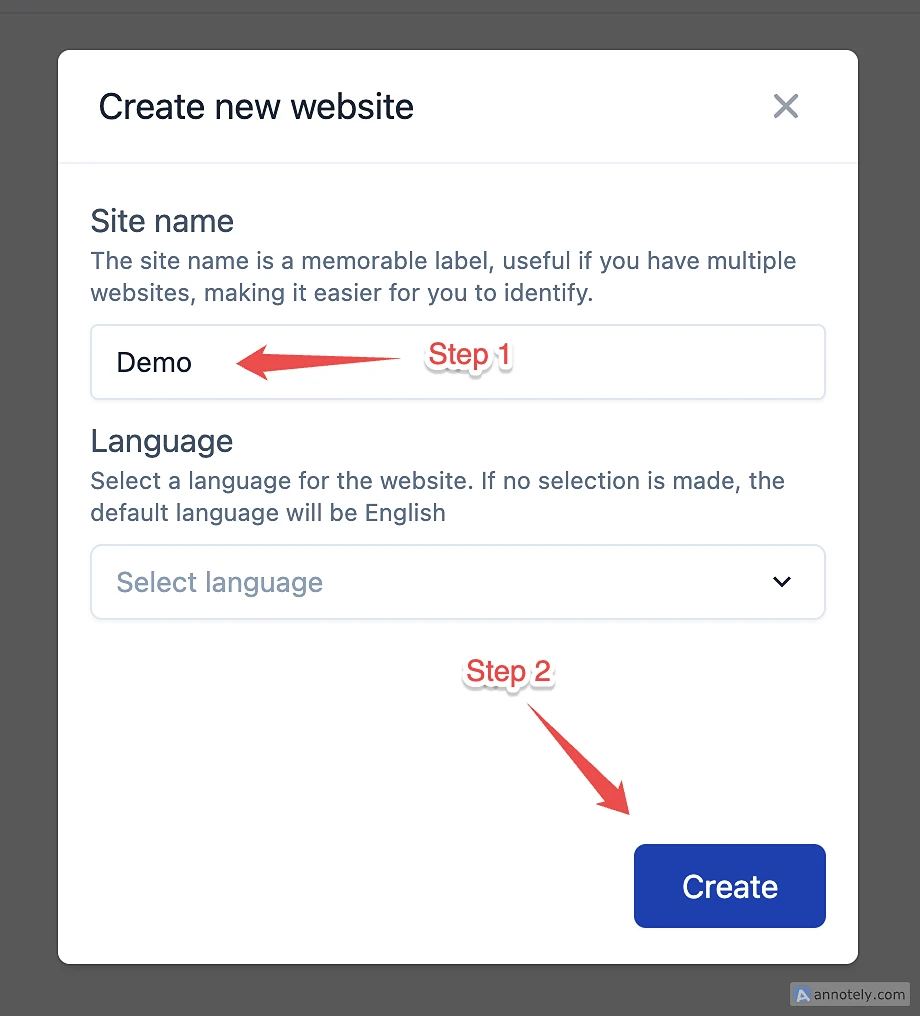
Click Create
👉 You now have a blank website ready to build
02
Apply a Template
Instead of starting from scratch, you can use templates.
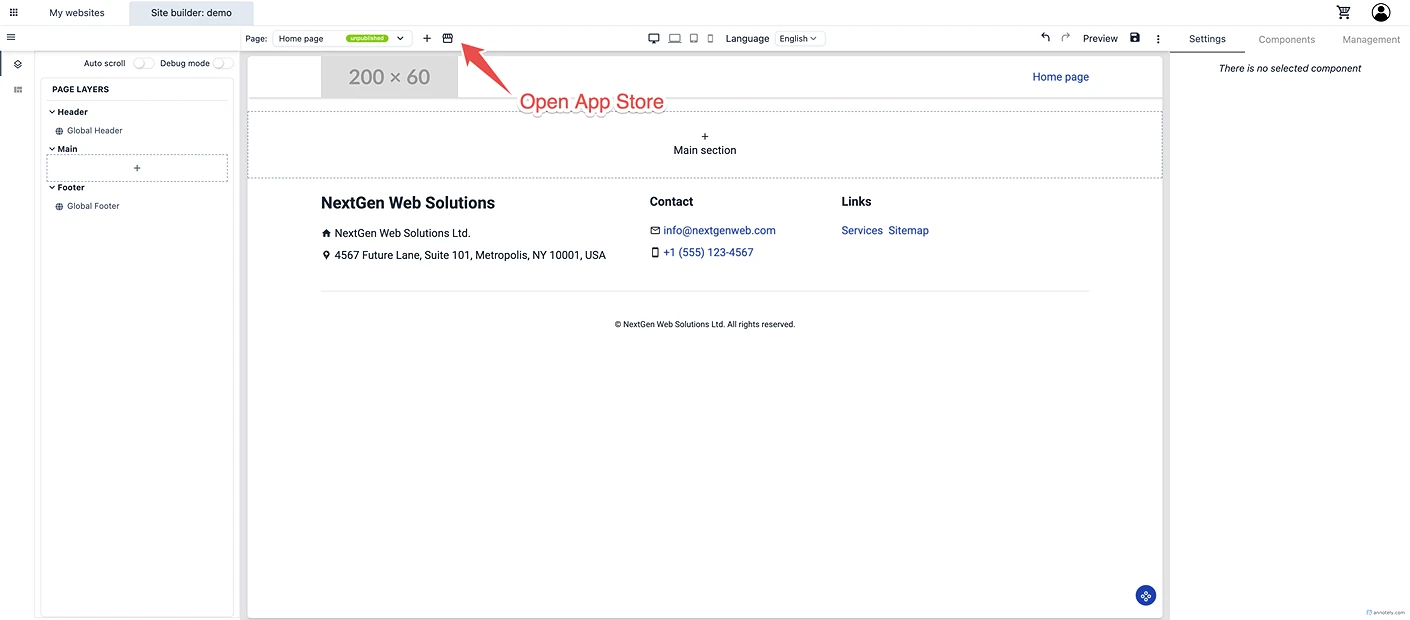
Open the App Store
Go to Single page templates
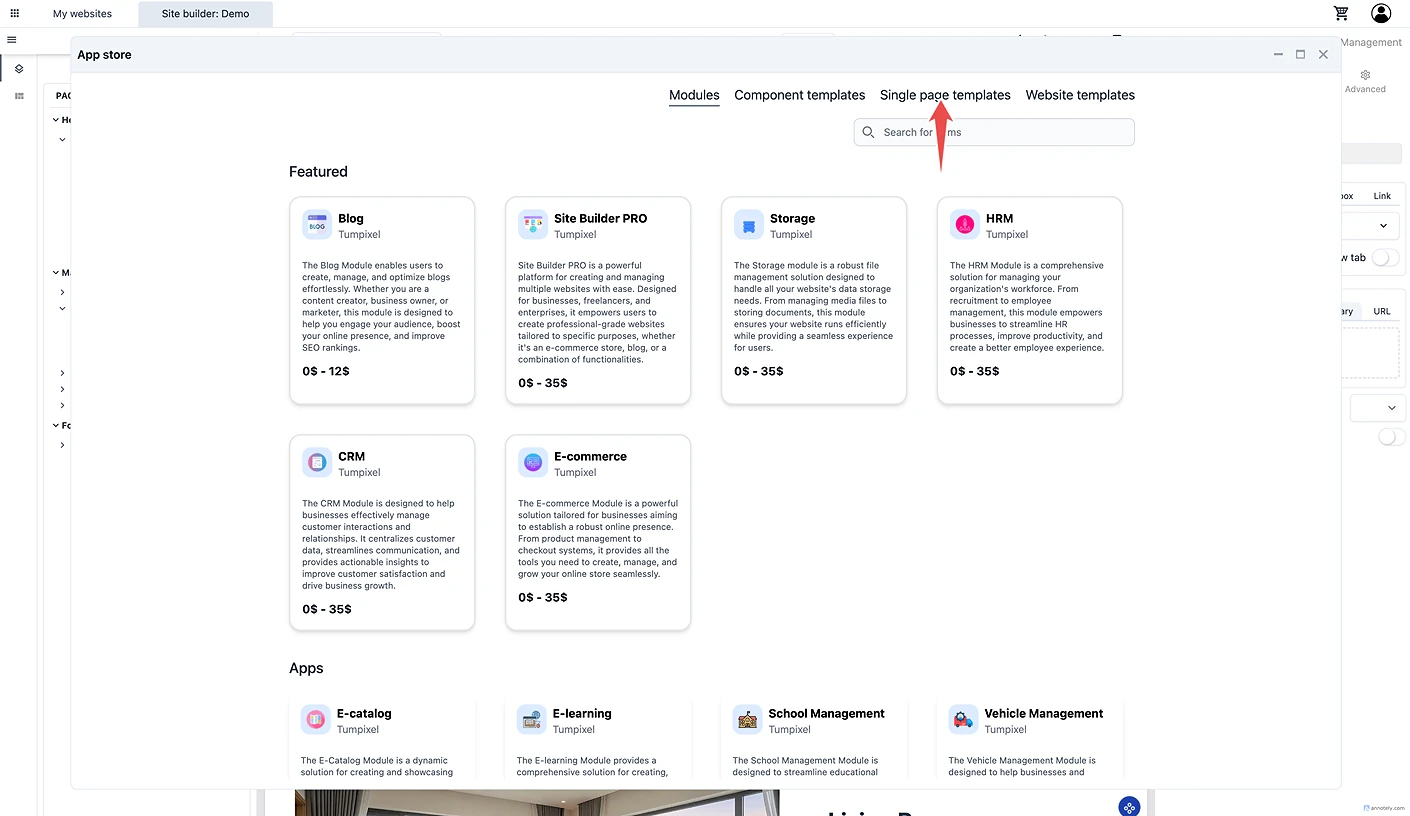
Choose a template (e.g. Landing page, Business site…)
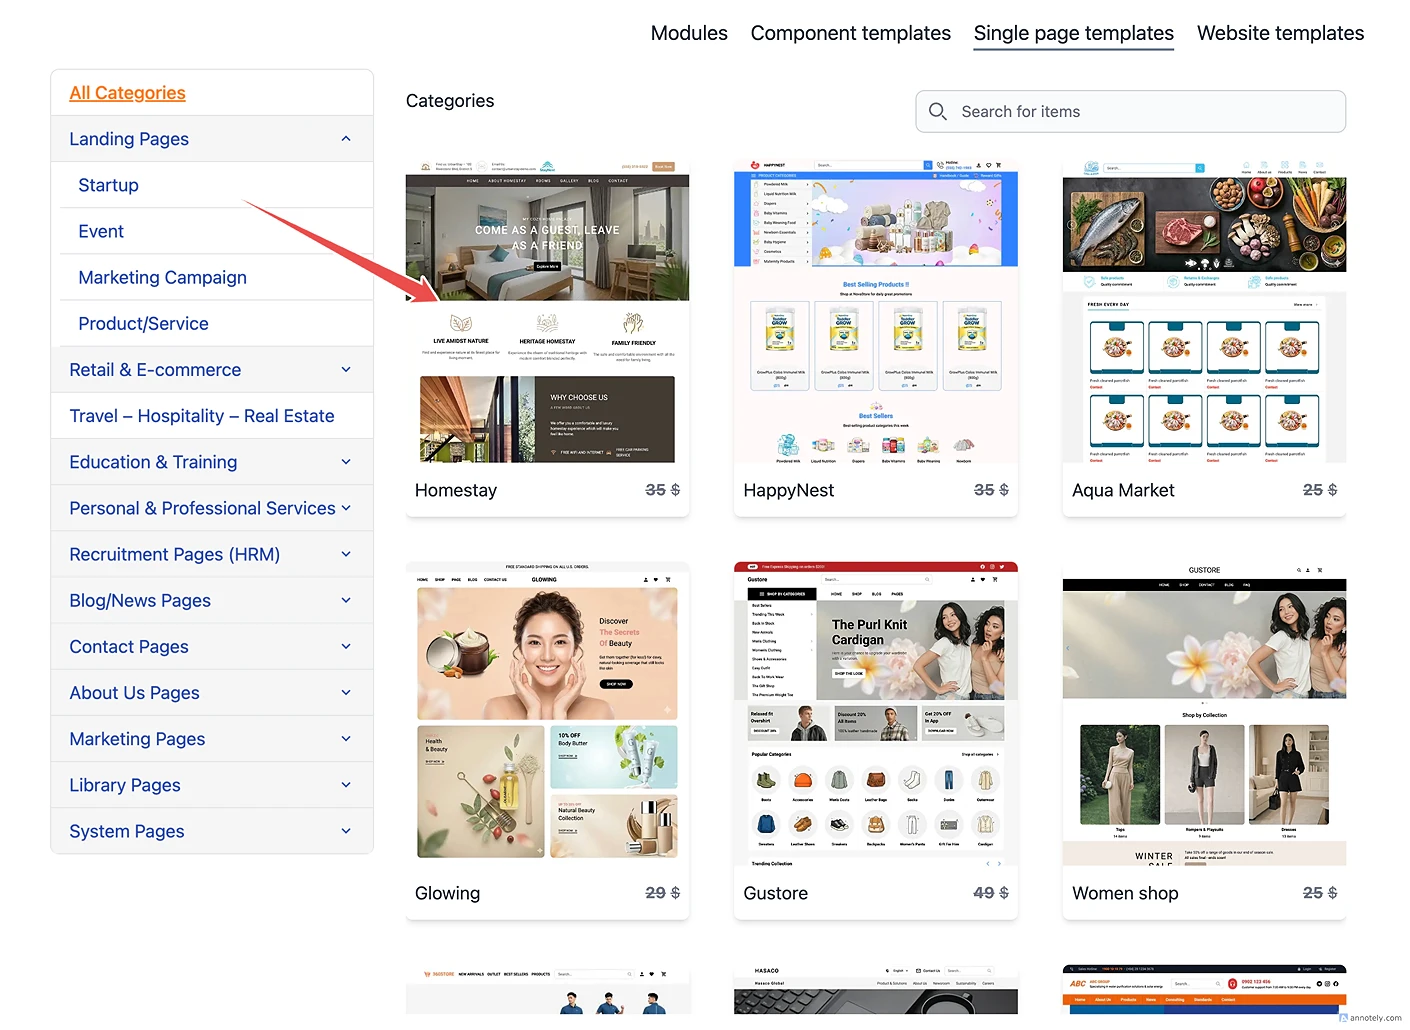
Click Apply to current page

👉 Your website now has a full layout instantly
03
Customize Content
Now edit your content visually:
Click any text → edit in the right panel
Update:
Titles
Descriptions
Buttons
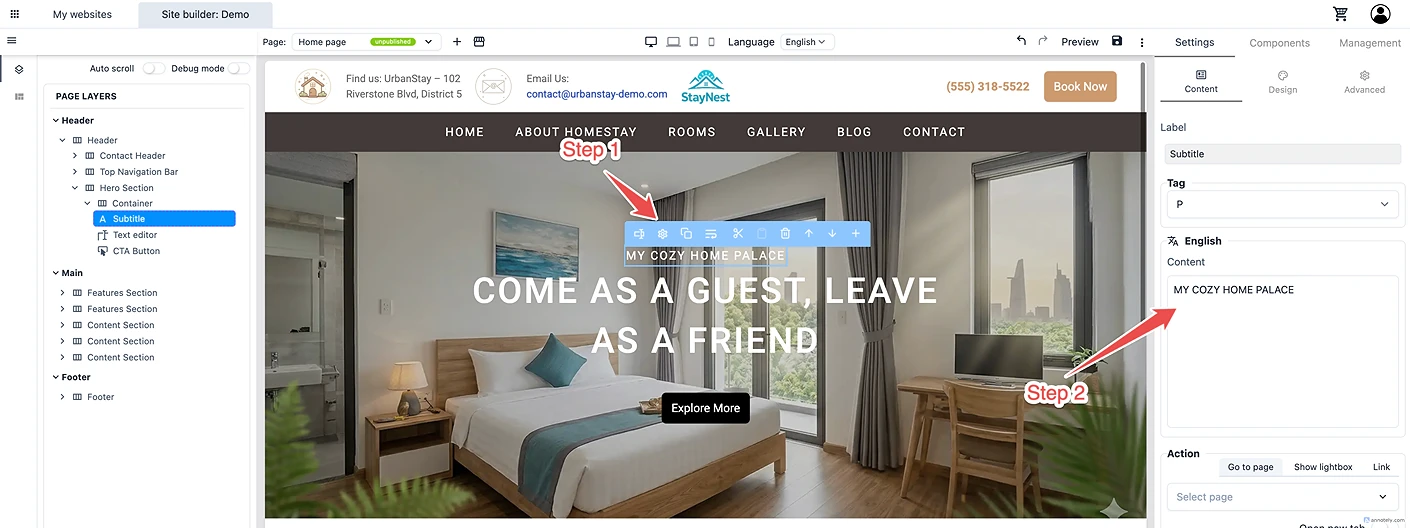
👉 This works similar to Webflow, but simpler
04
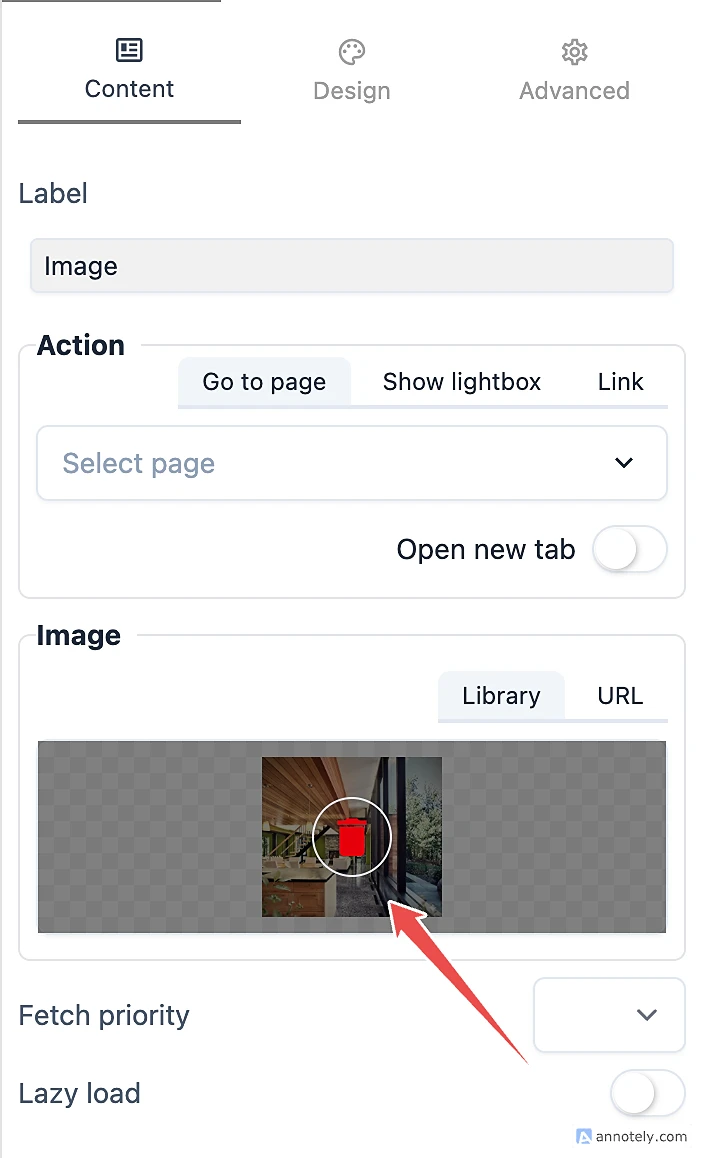
Replace Images
Click an image block → then:
Go to Content → Image
Upload or select an image
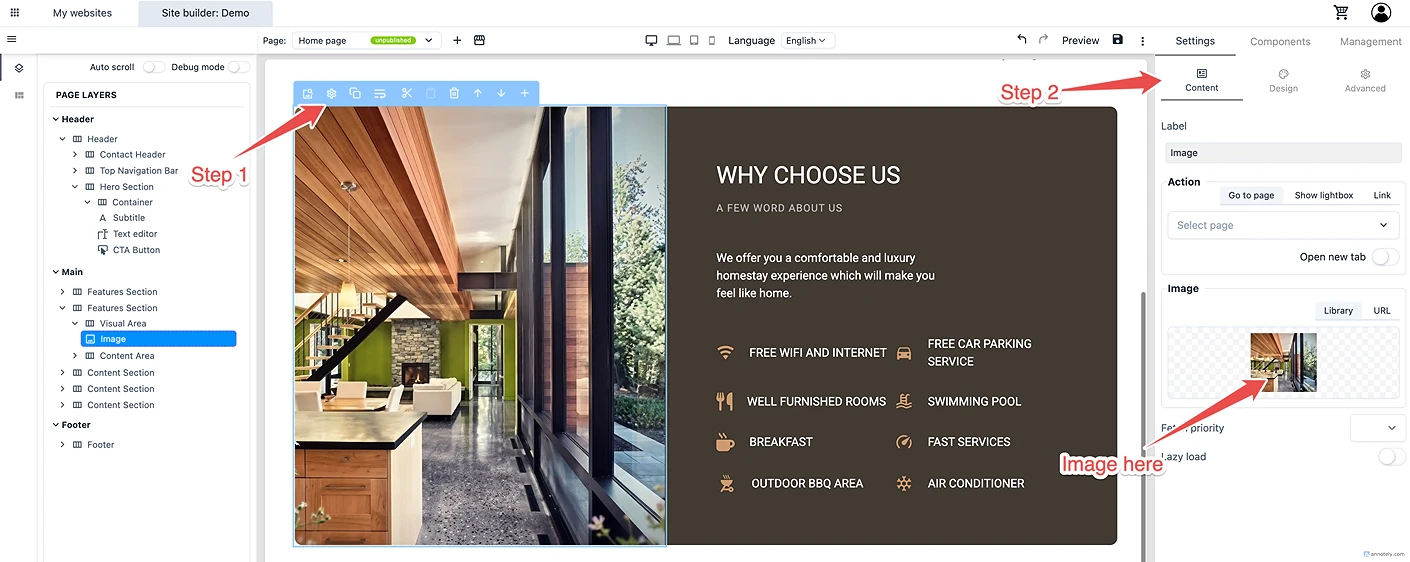
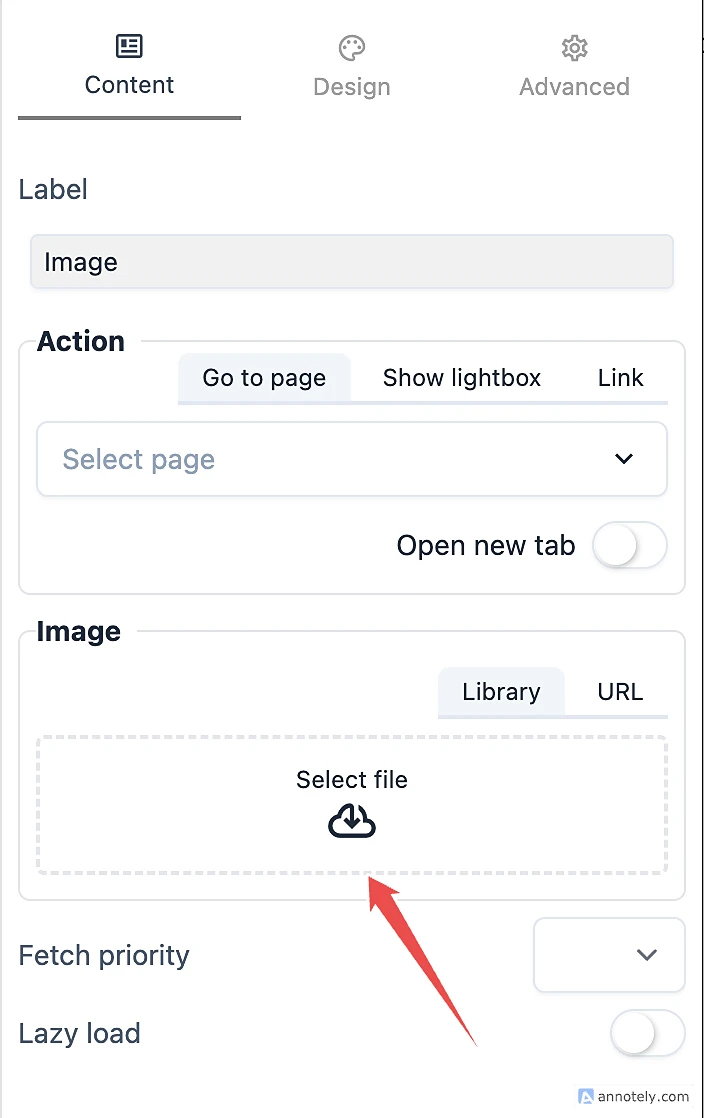
Delete the current selected image
Select a new image from file manager
👉 But here’s where many users hit an issue…
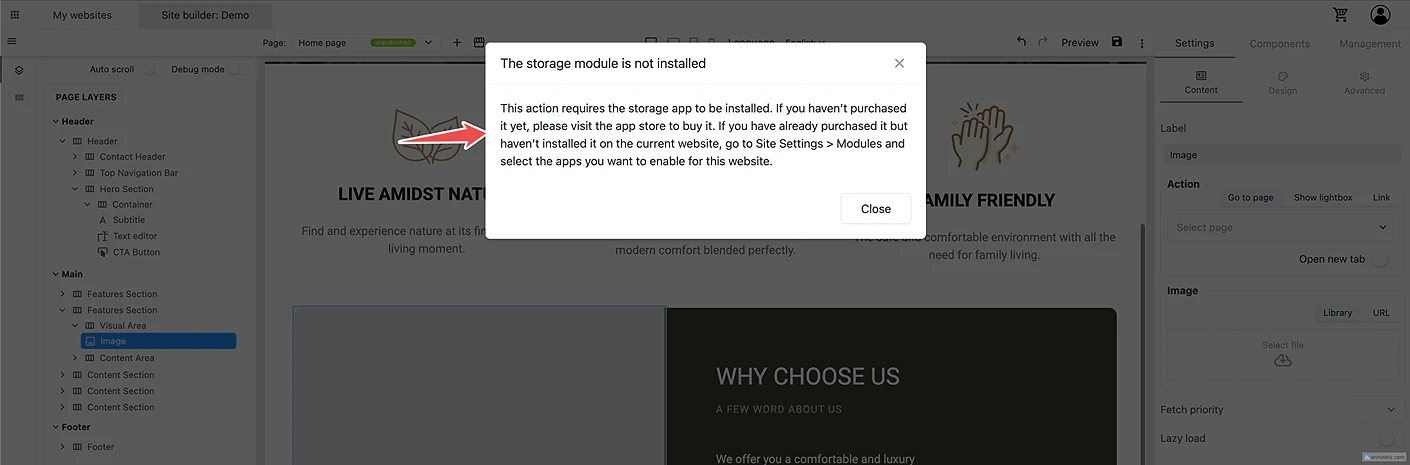
⚠️ Important Notice: Storage Module Required
If you try to upload an image, you may see this:
“The storage module is not installed”
or
“You do not have the right access to the 'Storage' module”
❗ Why This Happens
Tumpixel works differently from Wix or Shopify:
Features are provided as modules (apps)
You must:
Install (purchase) the module
Enable it per website
👉 Storage is required for:
Uploading images
Managing files
05
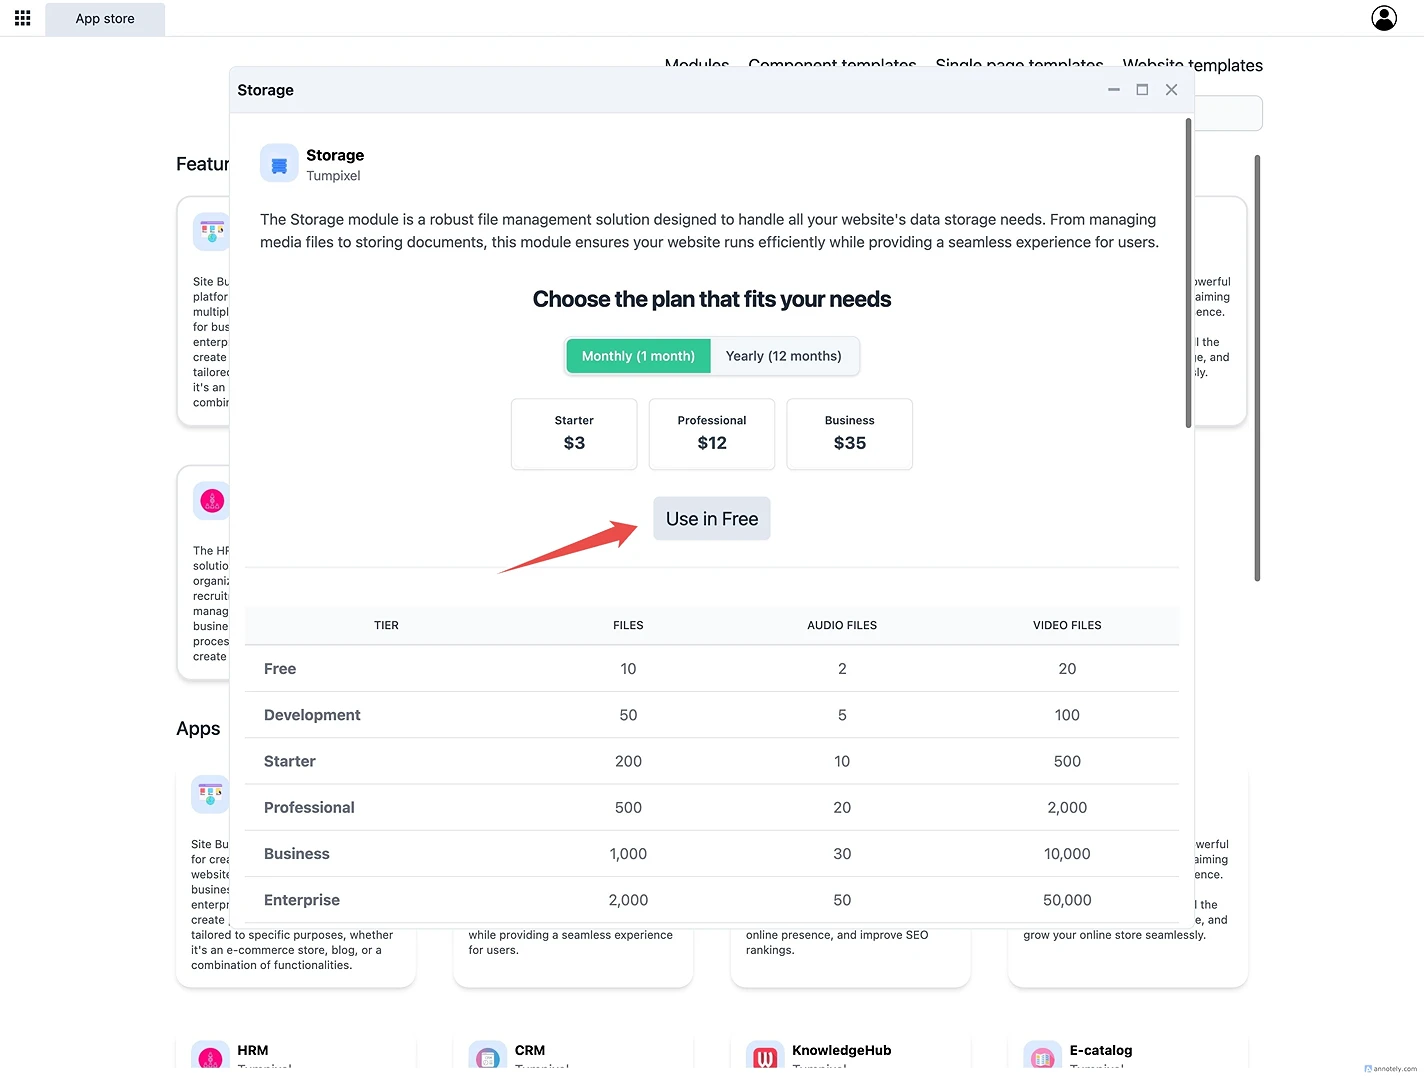
Install Storage Module
Open App Store
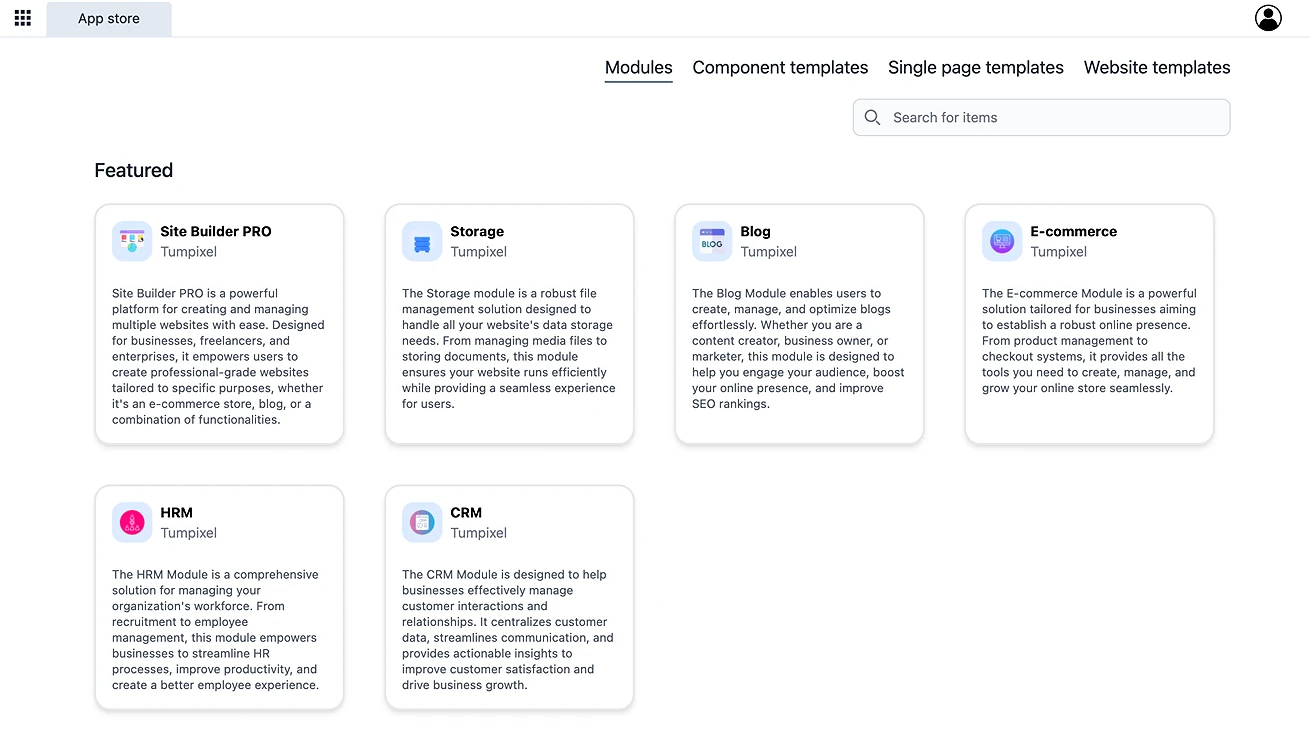
Find Storage
Choose a plan (Free is fine) then add to cart
06
Complete Checkout for Free Modules (No Payment Required)
🧾 Step 1: Review Order Details
In the checkout modal:
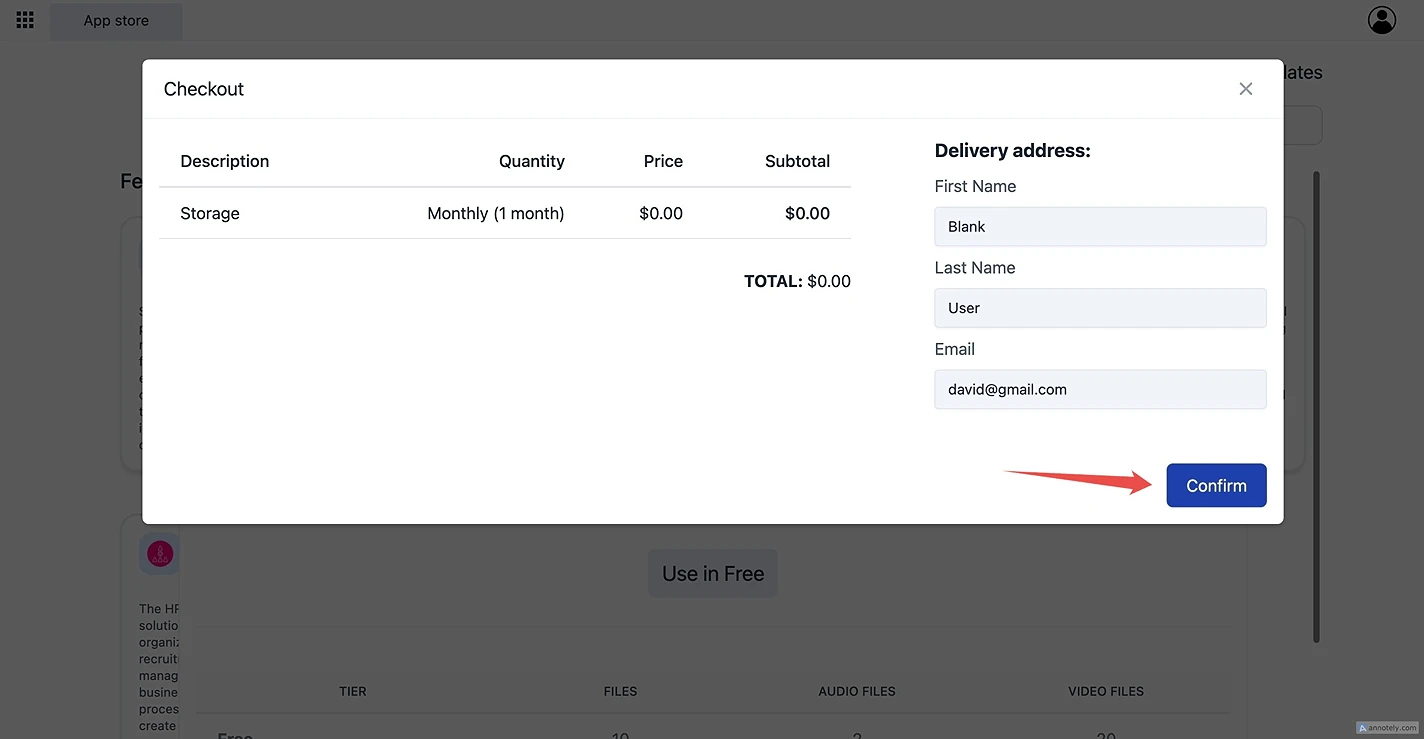
Module: Storage
Plan: Free
Total: $0.00
✅ Step 2: Click “Confirm”
Click the Confirm button to proceed
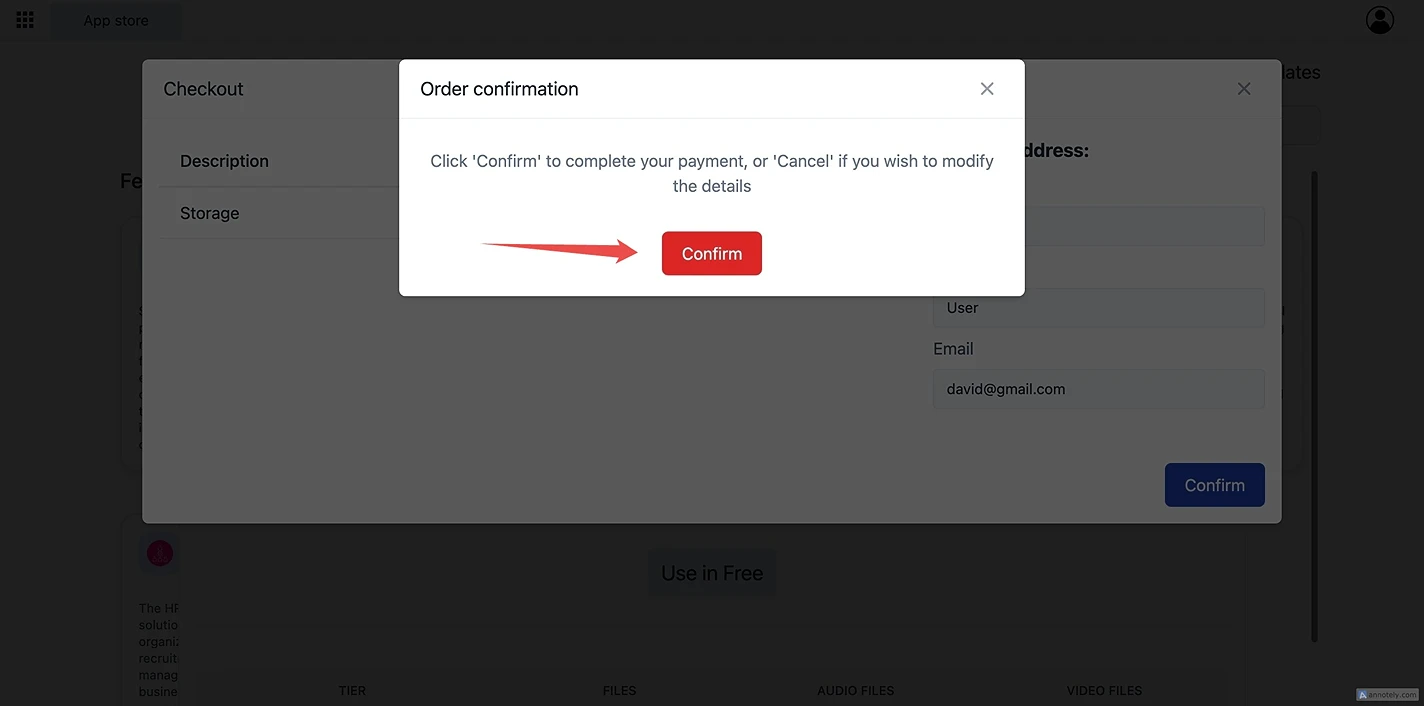
👉 What happens here:
No payment gateway is triggered
No credit card / external payment required
Order will be created immediately
🔒 Step 3: Final Confirmation
A confirmation dialog appears:
07
Verify Your Purchase & Access Your Module (After Checkout)
After completing your purchase, Tumpixel gives you full visibility into your order and installed applications. This step ensures everything is correctly activated before you continue building your website.
🔍 Step 1: Open Account Menu
Click your profile icon (top right corner)
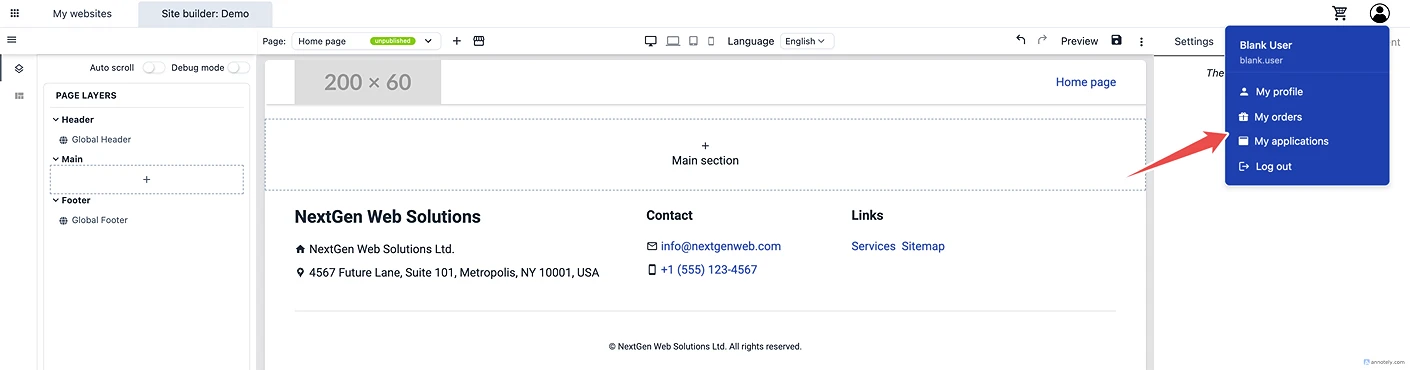
2. Select:
My orders → to view purchases
My applications → to view activated modules
👉 These are your two key areas after checkout
📦 Step 2: Check Your Order Status
Go to My orders

Here you will see:
Module name (e.g. Storage)
Plan (Free / Starter / etc.)
Order status → Active
Payment status → Paid
Created date
✅ If everything is correct:
Your purchase is successful and ready to use
🧩 Step 3: Verify Module Activation
Now go to My applications

Here you will see:
App name (e.g. Storage)
Tier (Free / Paid plan)
License key
Start date
✅ If the module appears here:
It is successfully attached to your account
08
Continue Using Your Module
Now go back to your builder:
Go to Site settings
Open Modules
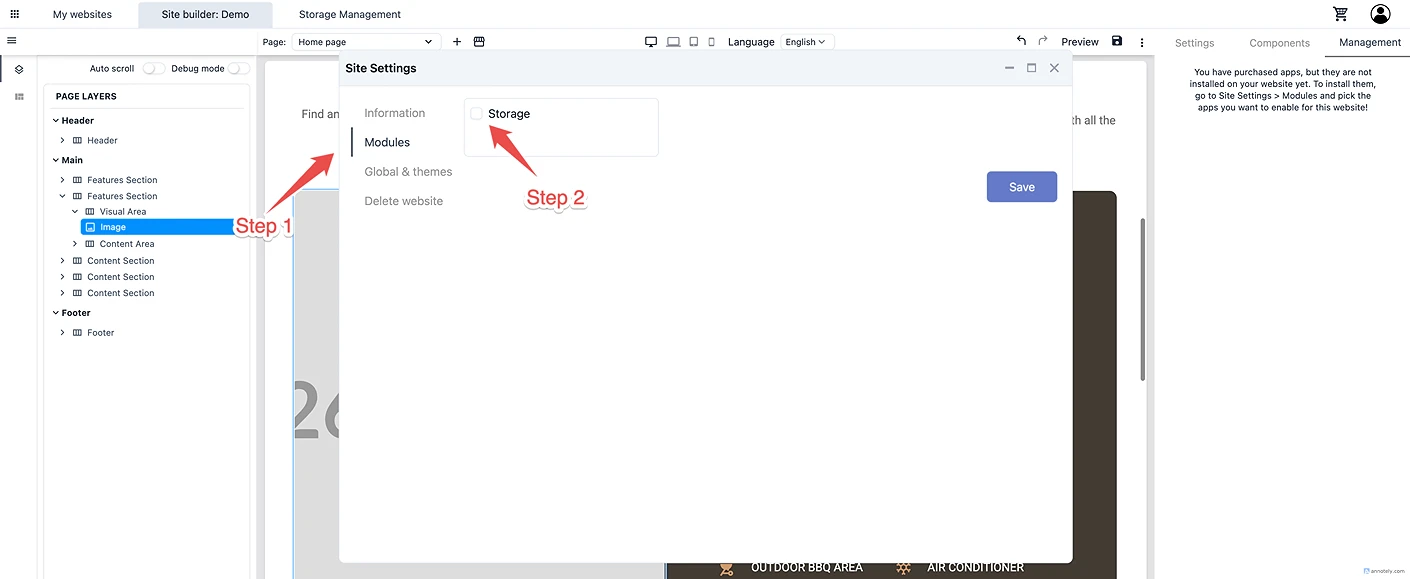
Enable Storage
Click Save
⚠️ After Purchase: Permission Issue (Very Important)
After installing, you might STILL see:
“You do not have the right access to the 'Storage' module”
🤔 Why?
Because Tumpixel uses session-based permissions
Your account is updated ✅
But your current login session is NOT refreshed ❌
✅ Fix (Required Step)
👉 You MUST:
Log out
Log in again
That’s it.
🎯 After Re-login
👉 Now storage is fully active
09
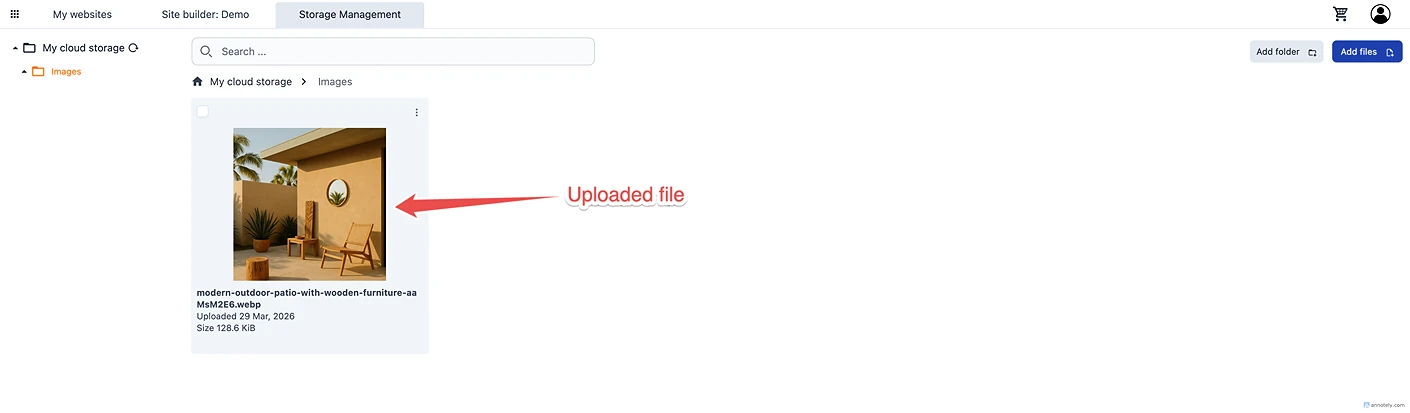
Upload Images
Once Storage is enabled:
Go to Storage Management
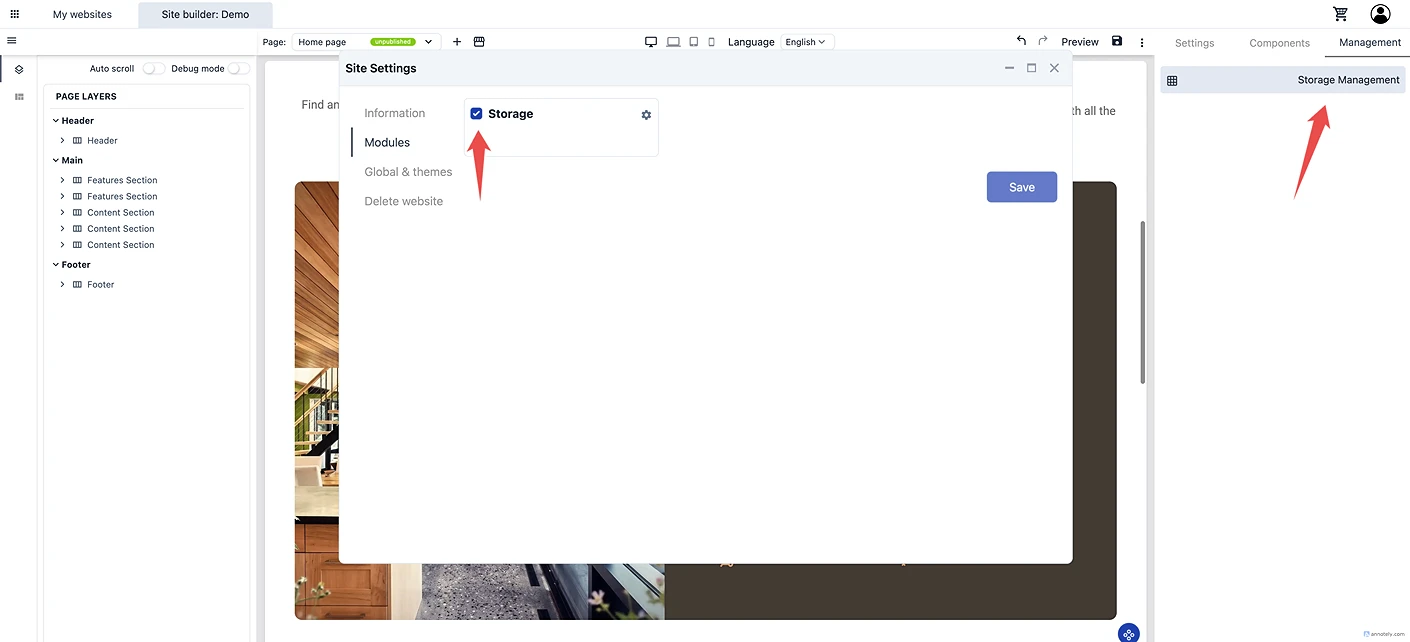
2. Click Add folder

3. Create folder (e.g. “Images”)

4. Open folder

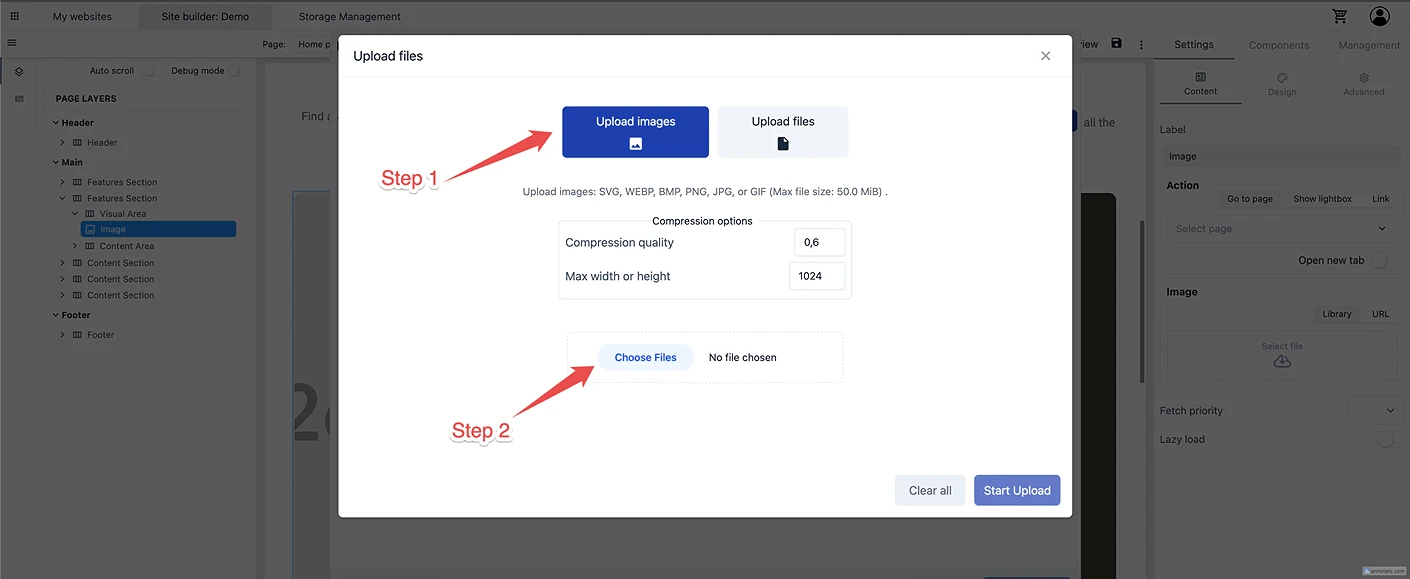
📤 Upload Files & Optimize Images in Storage
Tumpixel provides a flexible uploader with 2 modes and built-in image optimization to ensure your website stays fast and efficient.
🚀 Step 1: Open Upload Panel
Click Add files (top right in Storage)
The Upload modal will appear
🔀 Step 2: Choose Upload Mode
You have 2 options:
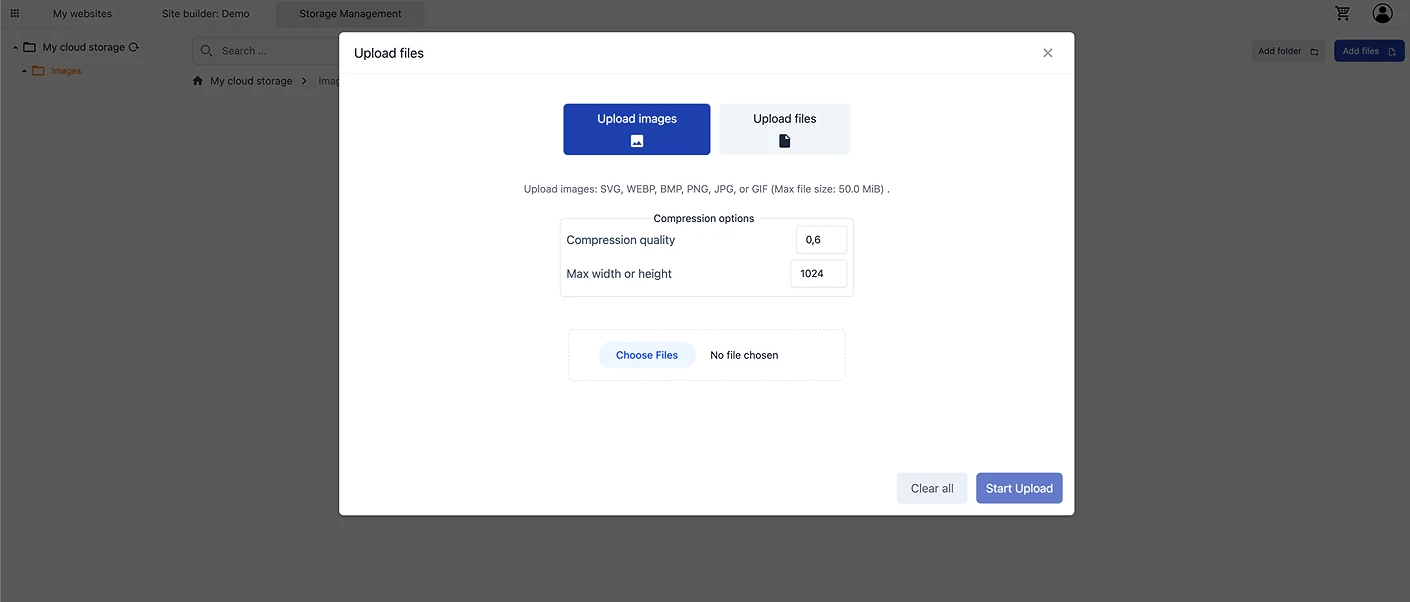
🖼️ Step 3: Upload Images (Recommended for website content)
Supports: SVG, WEBP, BMP, PNG, JPG, GIF
Automatically optimized for web performance
Enables compression settings
👉 Use this for:
Website images
Backgrounds
Thumbnails
📁 Step 4: Upload Files (Raw upload)
Upload any file type (docs, PDFs, etc.)
No optimization applied
👉 Use this for:
Documents
Downloads
Assets that must keep original quality
⚙️ Step 5: Configure Image Optimization
When using Upload Images, you get 2 levels of control:
🌐 Global Settings (Apply to all files)
These settings apply to all selected images:
Compression quality (e.g. 0.6)
→ Lower = smaller file size, faster loadMax width or height (e.g. 1024px)
→ Automatically resize large images
👉 Best practice:
Use 0.6 – 0.8 quality
Limit width to 1024–1920px
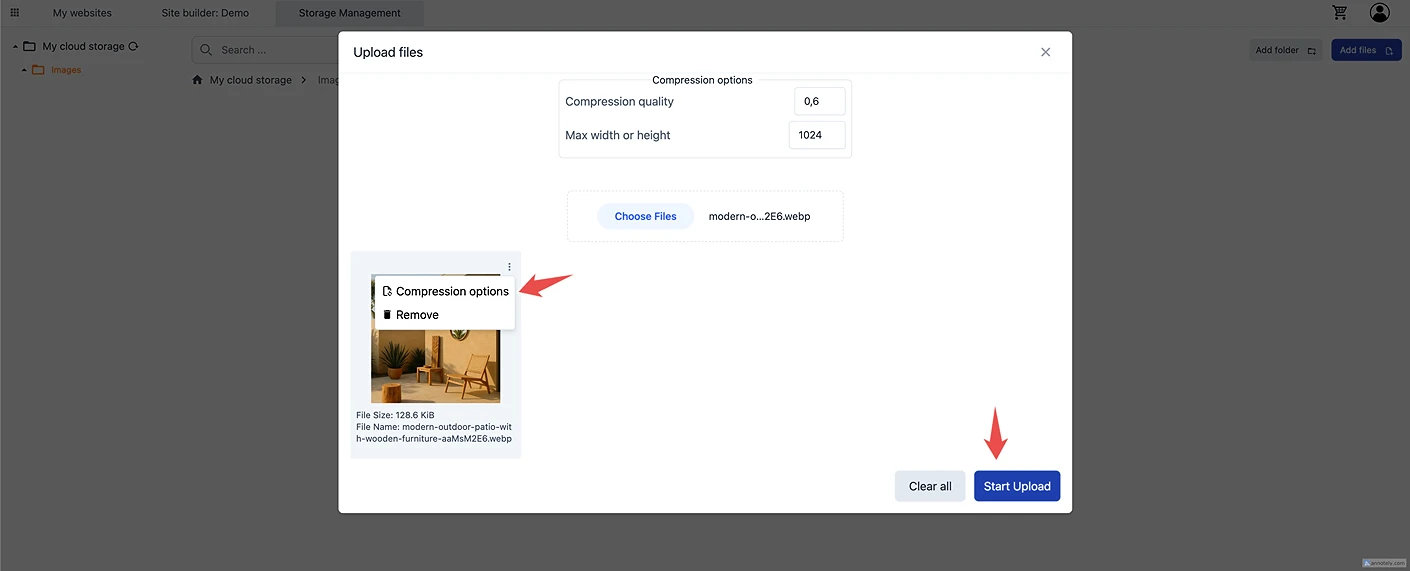
🧩 Individual File Settings
Each image can be customized:
Click the 3-dot menu on an image
Choose:
Compression options
Remove
👉 Useful when:
Some images need higher quality (e.g. banners)
Others can be heavily compressed (e.g. thumbnails)
📎 Step 6: Select Files
Click Choose Files
Select one or multiple files
Preview will appear
You’ll see:
File name
File size
Thumbnail preview
▶️ Step 7: Start Upload
Click Start Upload
👉 What happens:
Images are processed (resized + compressed)
Files are uploaded to your Storage
Ready to use in your website
🧠 Why This Matters (Performance)
Unlike many builders:
Tumpixel lets you control image optimization at upload time
Reduces:
Page load time
Bandwidth usage
Storage cost
👉 This is closer to developer-level control, not just basic upload
10
Use Images in Website
Back in the builder:
Click an image block
Click Select file
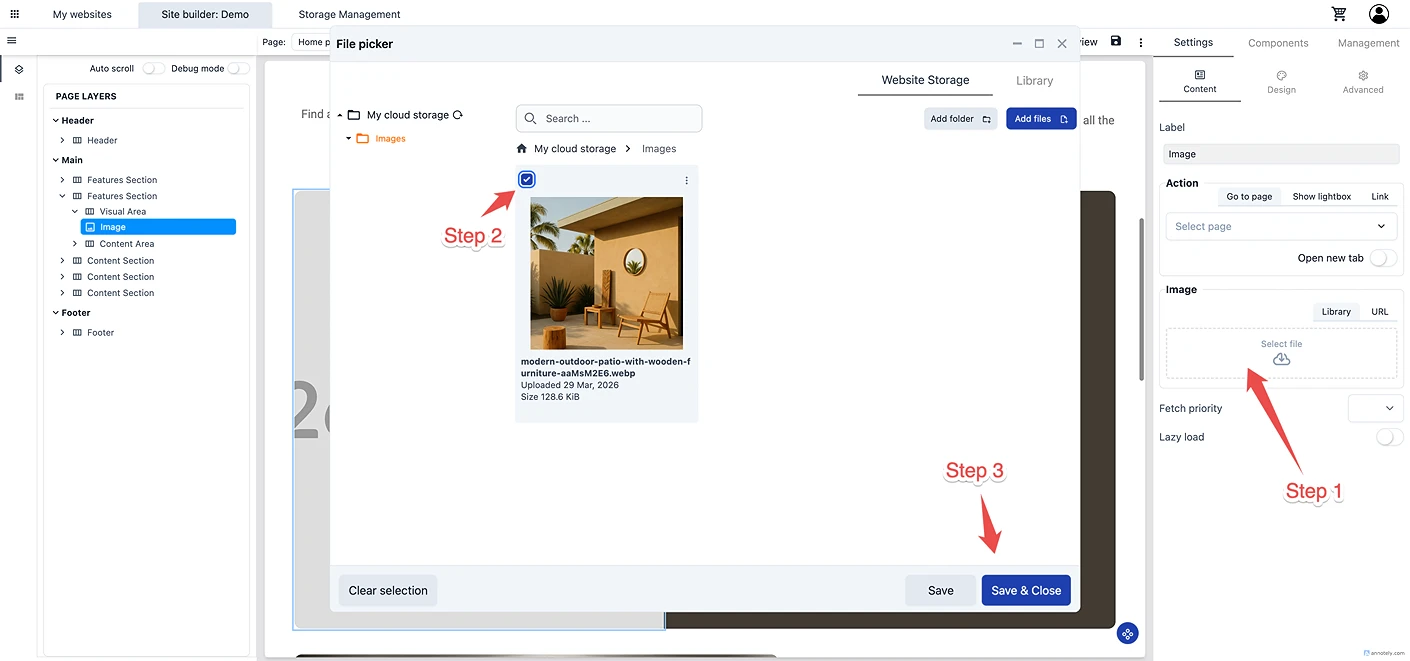
Choose your uploaded image
Save & Close
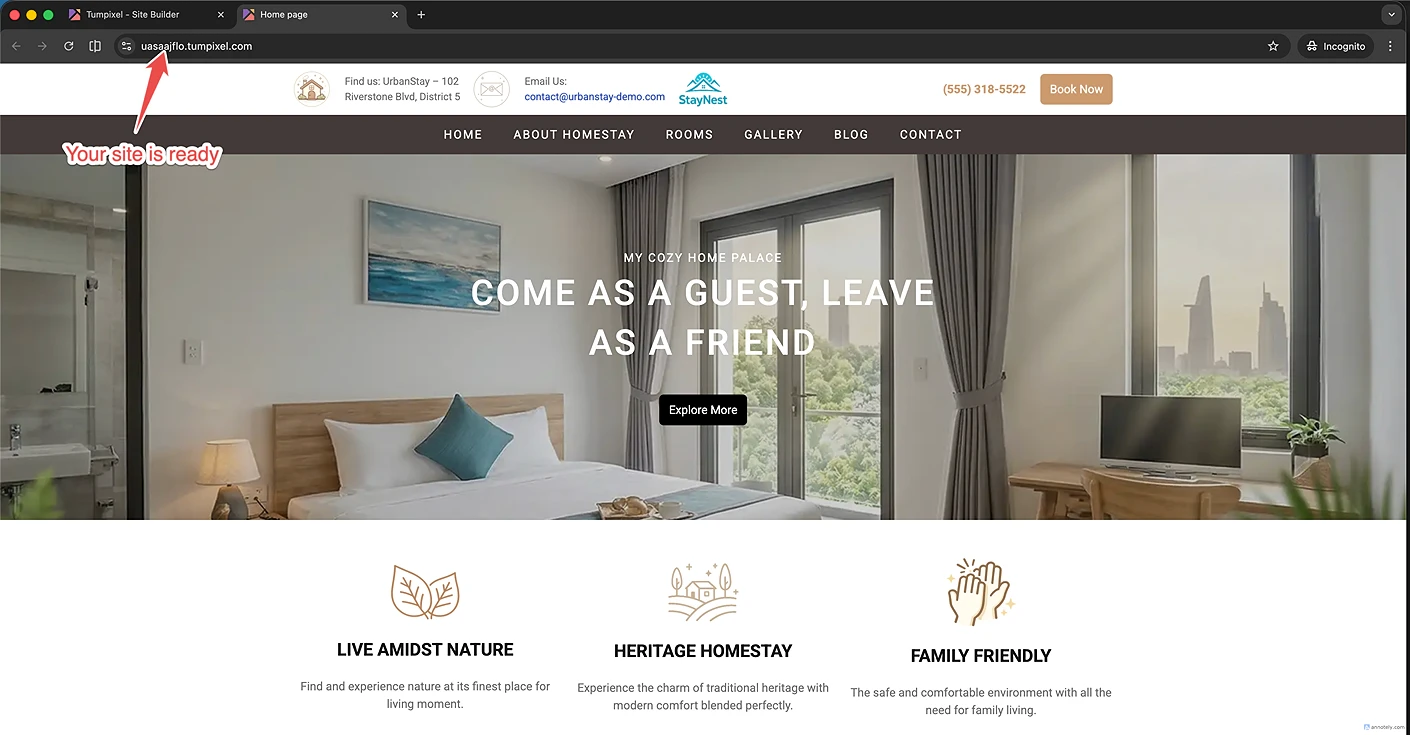
👉 Your website now looks real and complete
11
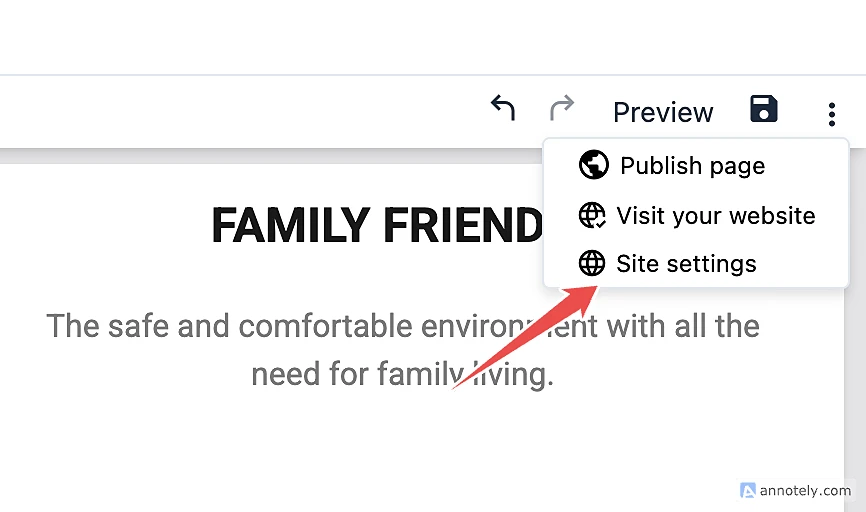
Publish Your Website
Final step:
Click ⋮ (menu)
Select Publish page
Open your site URL

🎉 Your website is now LIVE
🧠 Understanding Tumpixel (Important)
This flow may feel different if you come from:
Wix
Shopify
WordPress
Because Tumpixel is built with a different philosophy:
🔹 Traditional Builders
Everything is bundled
Limited flexibility
Hard to scale
🔹 Tumpixel Approach
Modules = features (Storage, CRM, E-commerce…)
Purchased at account level
Activated per website
👉 This gives you:
Multi-site control
Enterprise flexibility
Scalable architecture
⚠️ Known Limitation (Current Version)
Right now:
After purchasing a module → session is not auto refreshed
👉 So you must:
Logout → Login again
This will likely be improved later.
✅ Summary
You just learned how to:
Create a website
Apply templates
Edit content
Install modules
Fix permission issues
Upload images
Publish your site
🎯 Final Thought
Tumpixel is not just a website builder.
It’s a platform to build systems.
That’s why:
It may feel slightly more complex at first
But gives you far more power long-term